Build Your Stroke
Build a stable stance, grip, and bridge.
Get your body into it.
Full-body examples and hand close-ups. Choose the situation, then inspect the support, foot placement, and space your cue needs.
Right cue hand · left bridge hand
Build the stance around the line.
Choose the shot upright. Then place your feet, lower your body, and leave the cue a clear route.
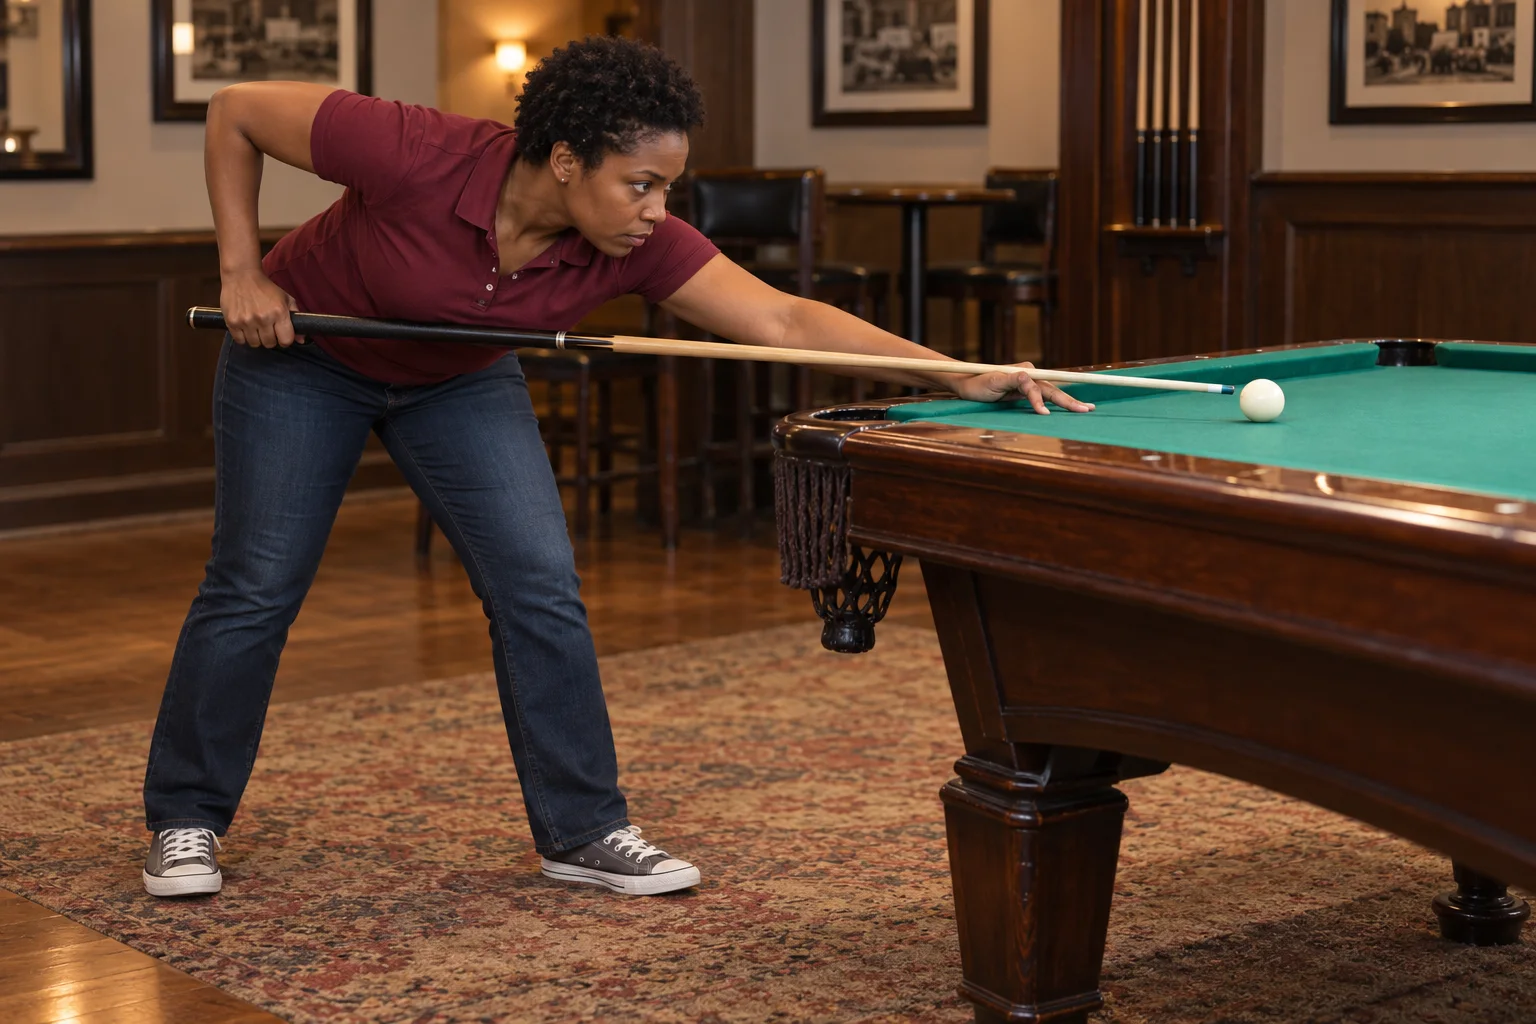
Bring your sighting position over the cue line at a comfortable head height.
Reach from a balanced base. Let the bridge arm settle without pulling the torso forward.
Leave space beside the hip for the grip hand and the whole practice stroke.
Feet & body clearance
The staggered shoes show one starting arrangement. Adjust their spacing and turn until you can stay still without strain; neither shoe has to sit on an exact line.
The bridge hand
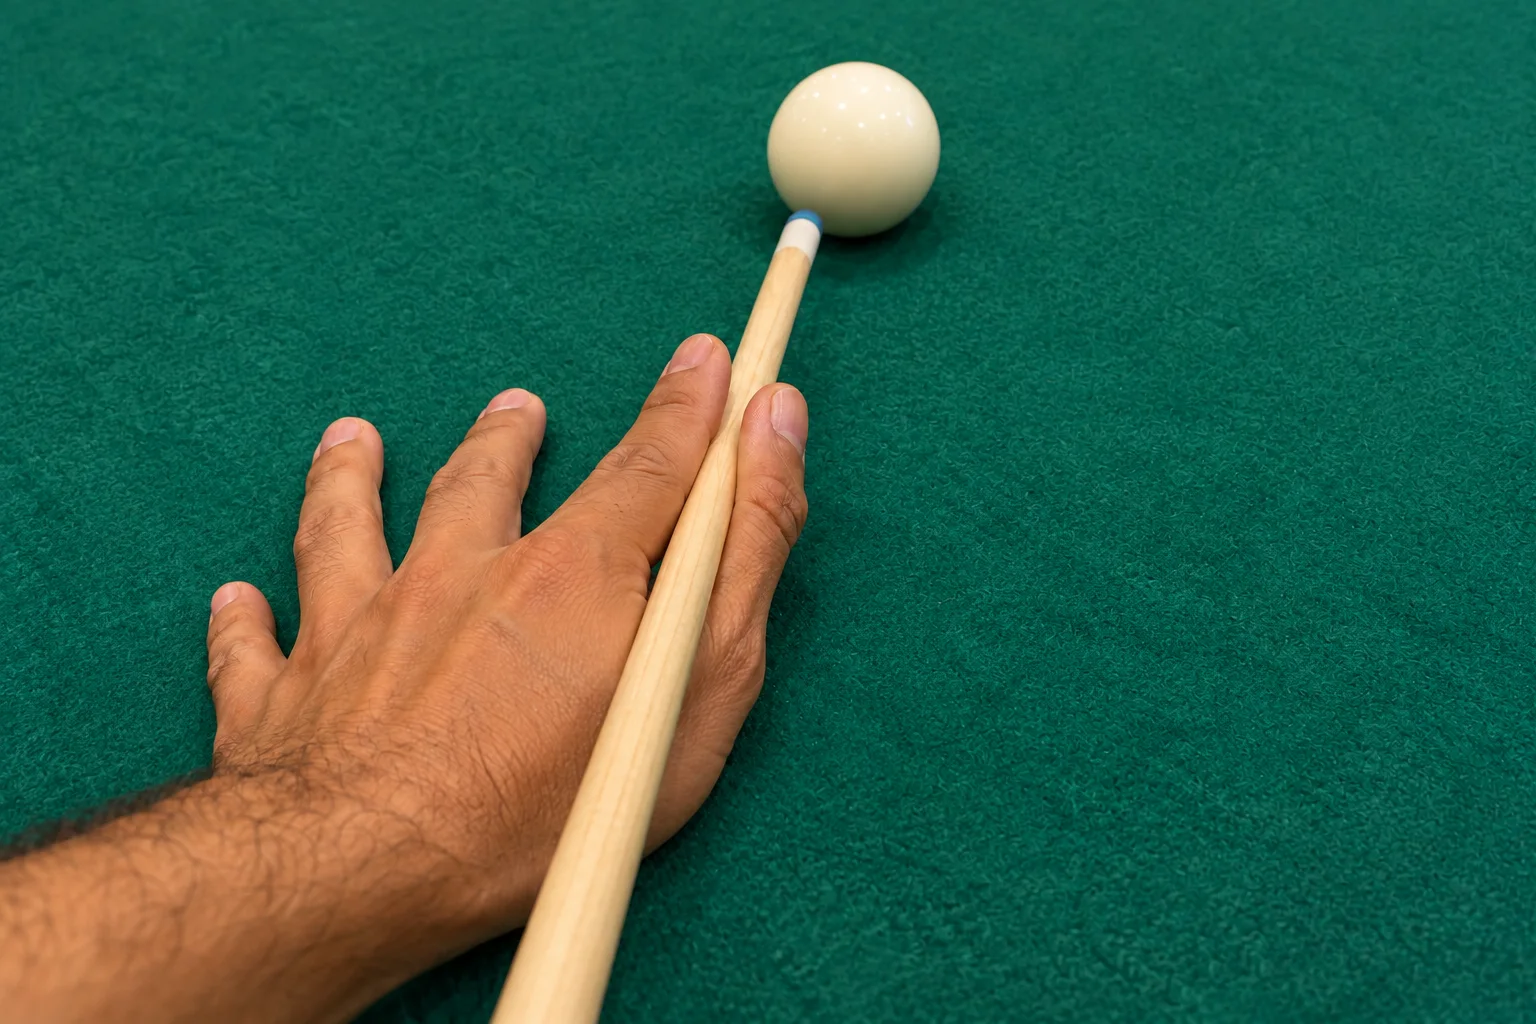
Spread the bridge fingers and settle the hand before the cue moves. Lift the thumb toward the index finger to form the open channel.
Take three slow practice strokes. If your hip, chest, or chin makes you steer the cue, stand up and move the stance.
A planted hand. A free cue.
A clear view and a stable thumb–index channel make a useful everyday bridge.
Sight along the cue before settling.
Keep the bridge arm comfortable and the hand planted.
Keep the grip relaxed as the cue slides through the channel.
Feet & body clearance
Keep the same comfortable stance while comparing hand shapes. Changing feet, grip, and bridge at once makes the comparison difficult.
The bridge hand
Start with the hand on the cloth and fingers spread. Bring the thumb snugly toward the index-finger base; the cue rests in the resulting V. Arch or flatten the hand to change support height.
The cue should slide without dragging, and the hand should stay still. Check the intended tip height before every delivery.
A loop, with room to move.
The index finger wraps around the shaft; the rest of the hand still supplies the base.
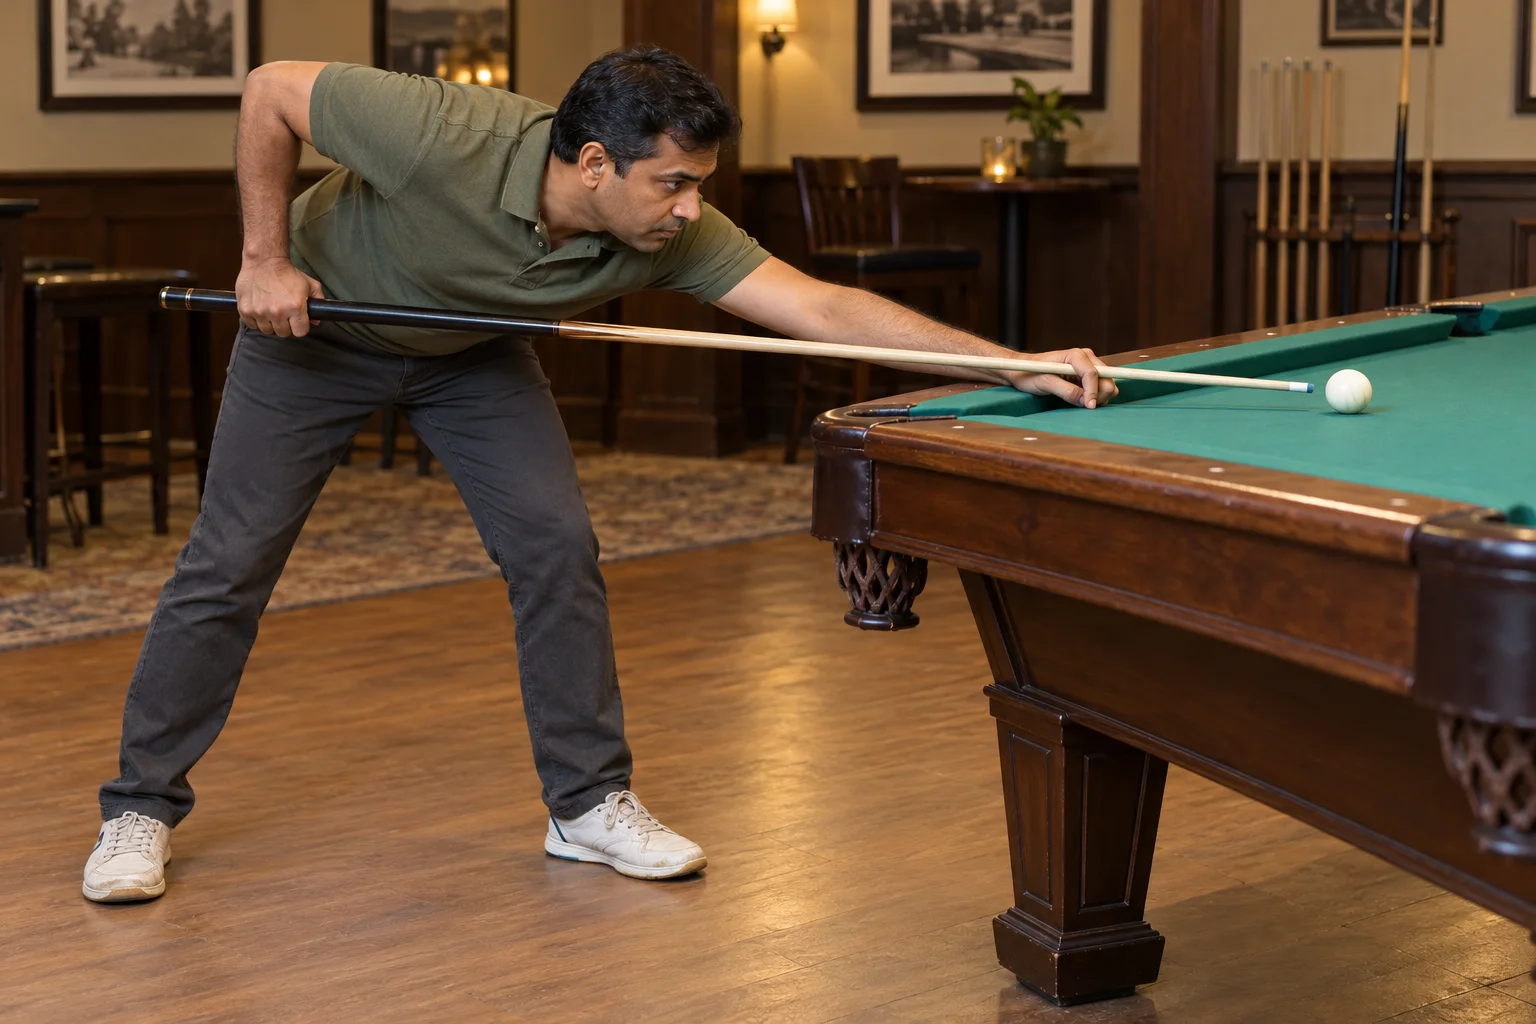
Keep your view of the shot clear.
Set the supporting hand before closing the index finger.
Deliver freely through the loop instead of squeezing it tighter at impact.
Feet & body clearance
The bridge choice does not require a different foot pattern. Keep a balanced base and enough room for the grip arm.
The bridge hand
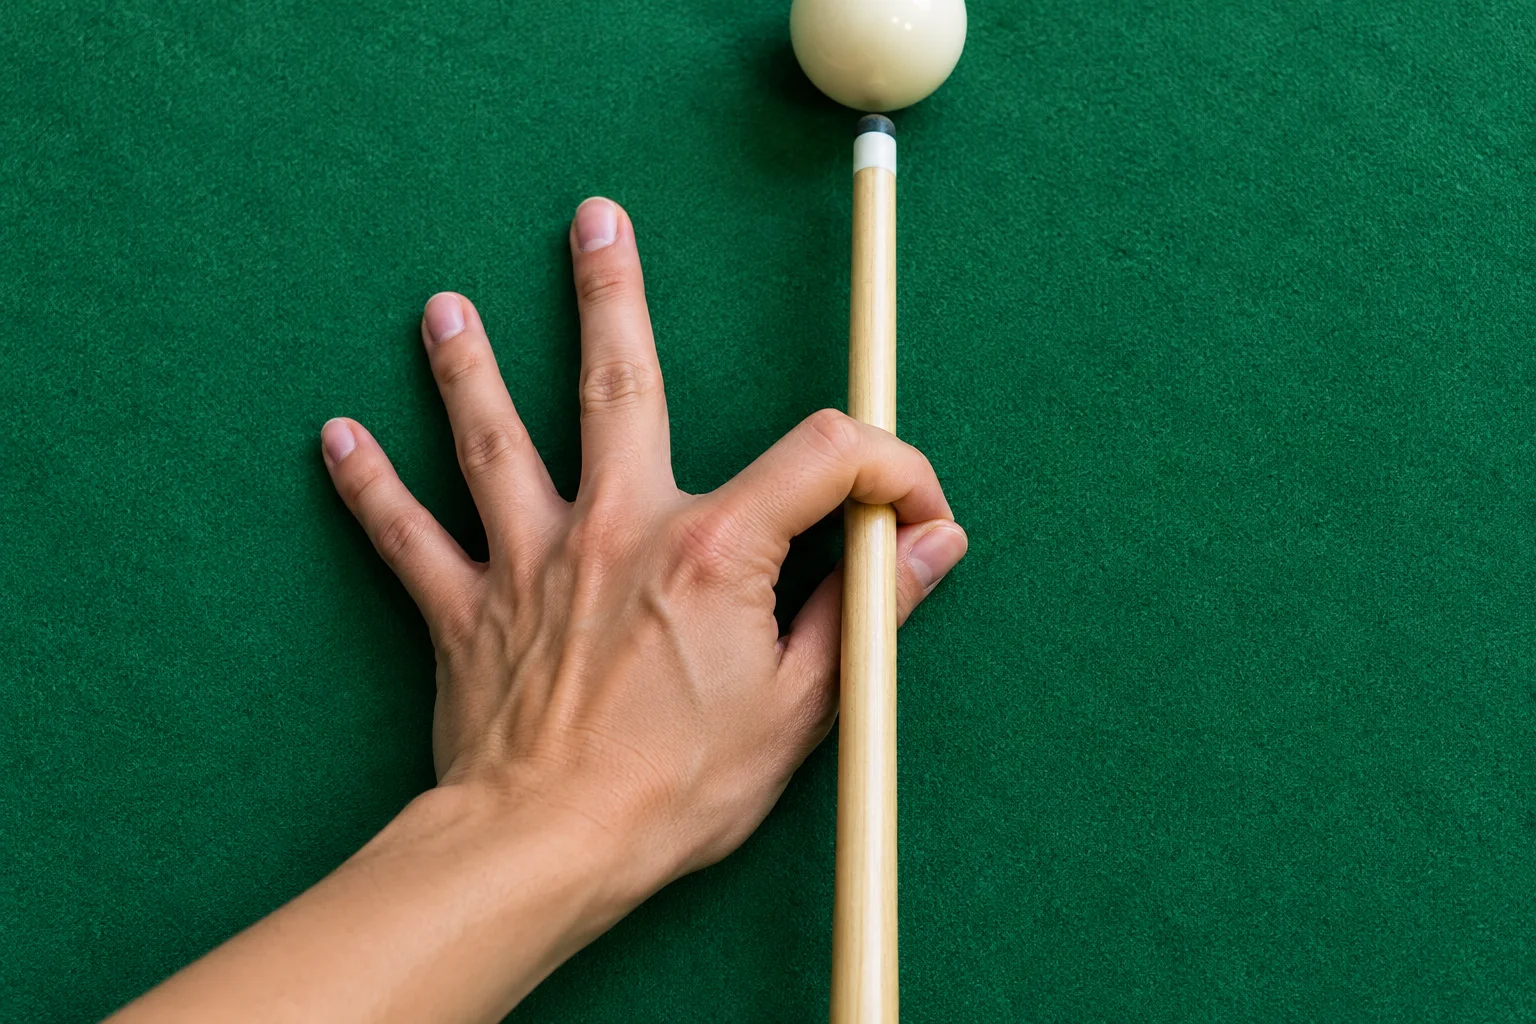
Curl the index finger around the shaft toward the thumb while the other fingers and hand support the bridge. Leave enough clearance for the shaft to slide smoothly.
If the loop catches the shaft or obscures your view, loosen it or use the open bridge.
Let the rail support the hand.
When the usual cloth bridge will not fit, move the support onto the rail.
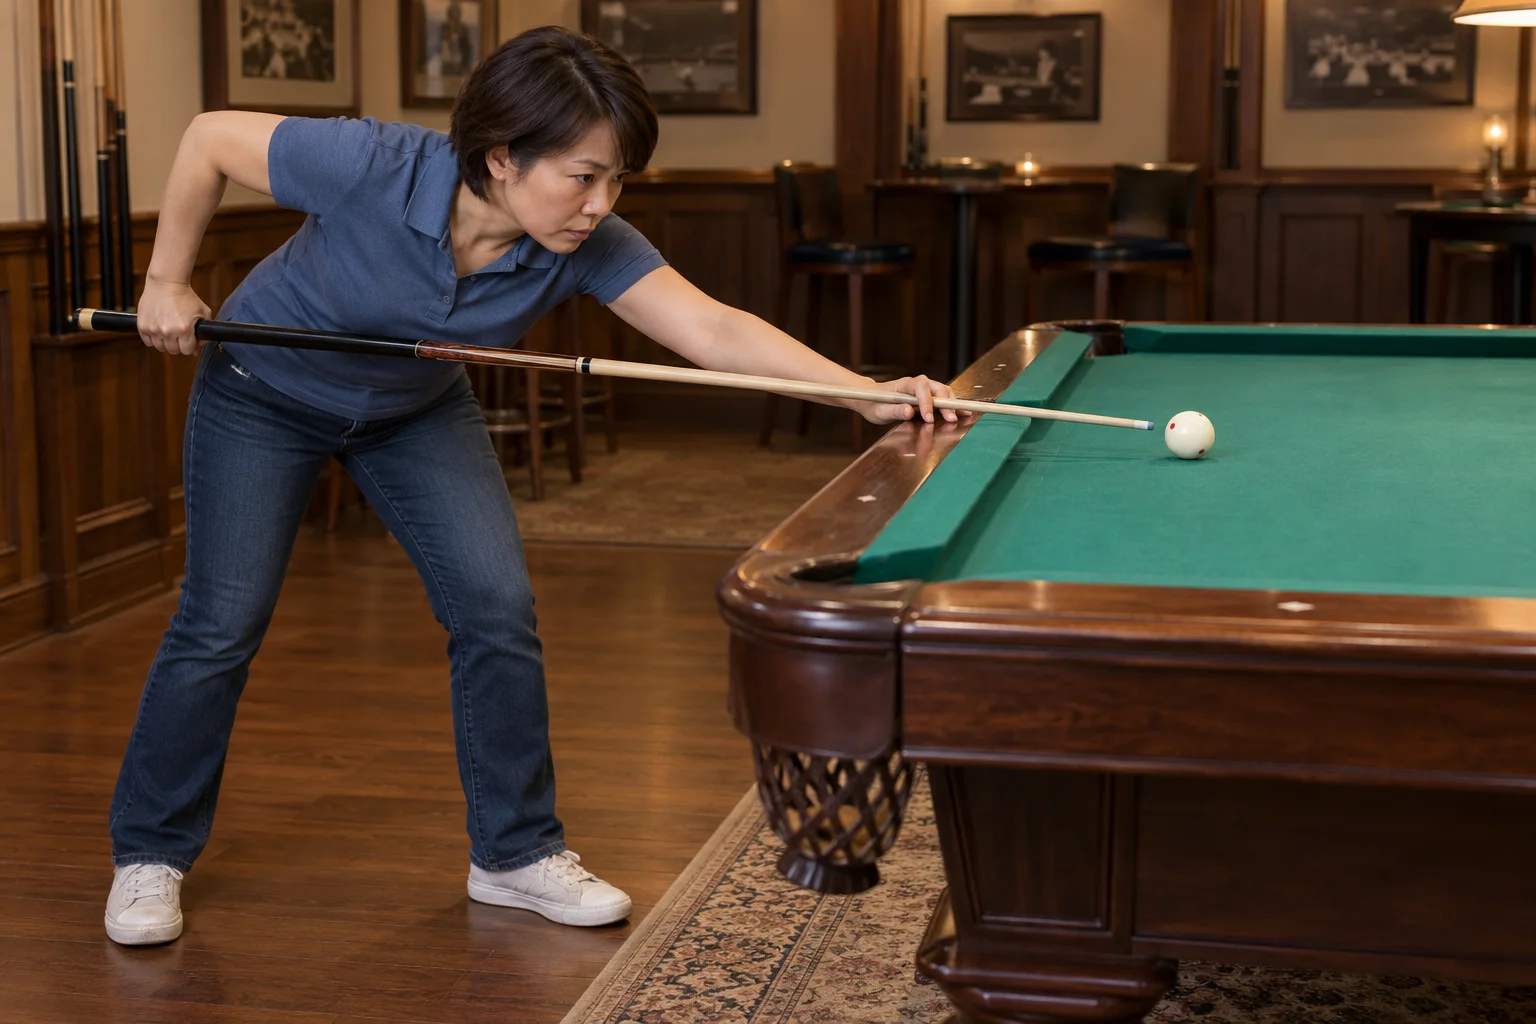
Keep a useful sightline as the bridge moves closer.
Plant the rail hand securely; keep it clear of the cue ball.
Check that the butt and grip hand clear the rail through the practice stroke.
Feet & body clearance
Move around the table until the cue passes beside the body. A closer bridge may call for a more upright stance or a shorter delivery.
The bridge hand
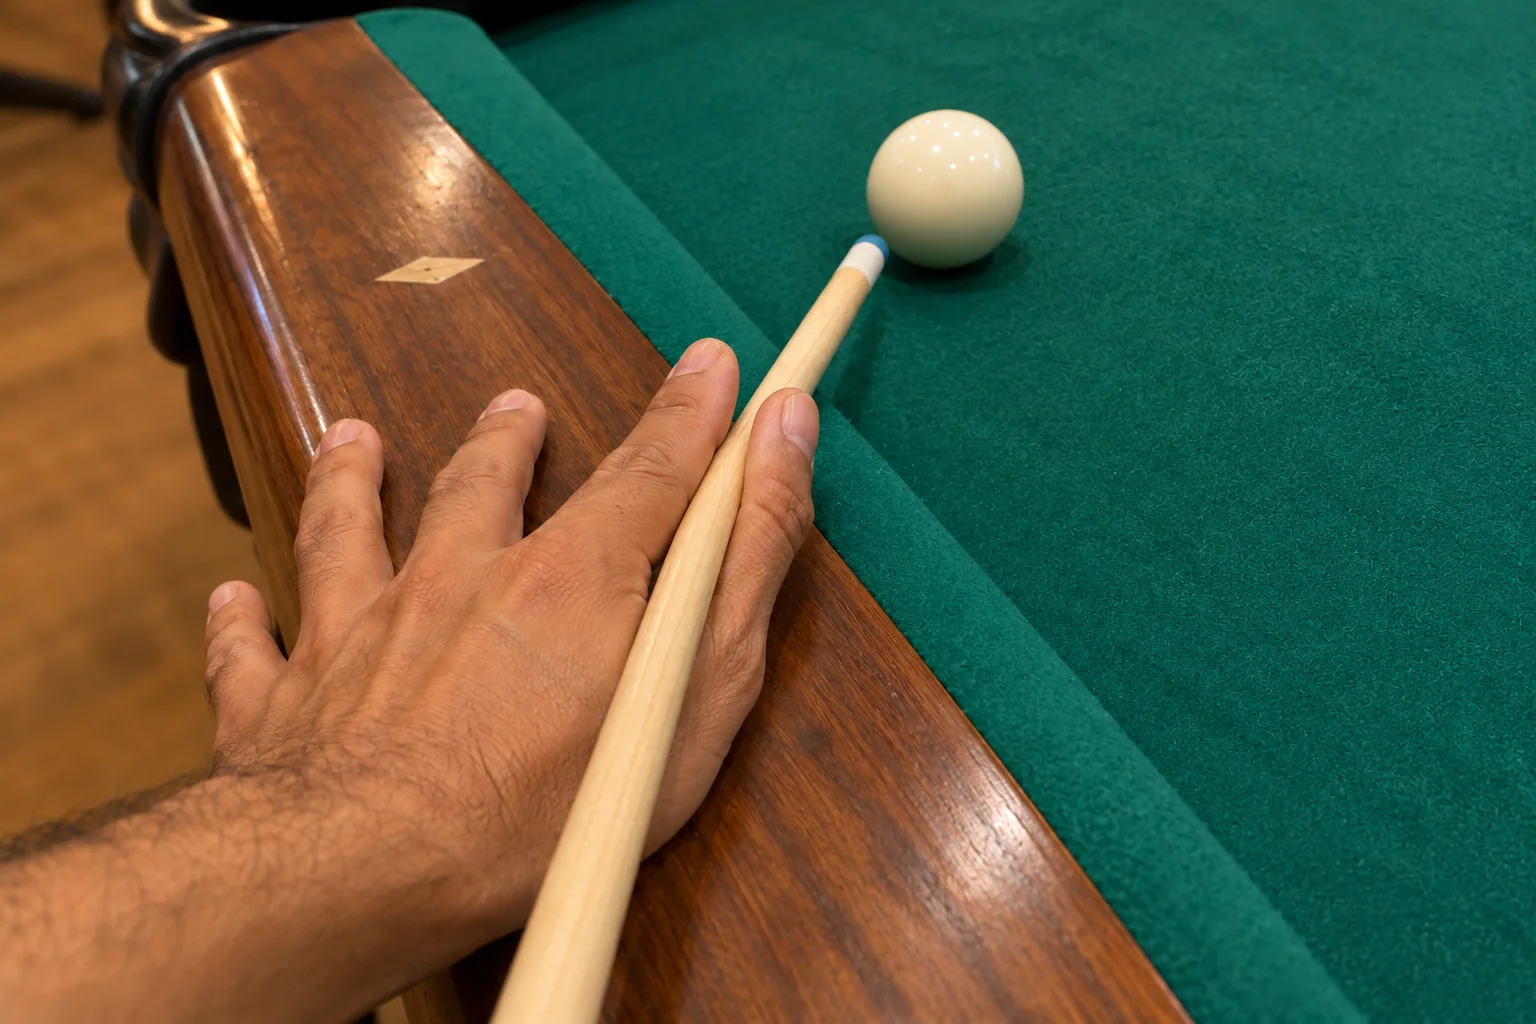
Use the rail as a base and let the fingers guide the cue. With enough space, some fingers can extend onto the cloth. Test the whole cue travel before playing.
Inspect the cue and hand clearance.
The cue must clear the cushion on both the backstroke and delivery. Add only the elevation the actual clearance requires.
Less room changes the contact.
A cue ball very close to the cushion leaves little room for the tip and ferrule.
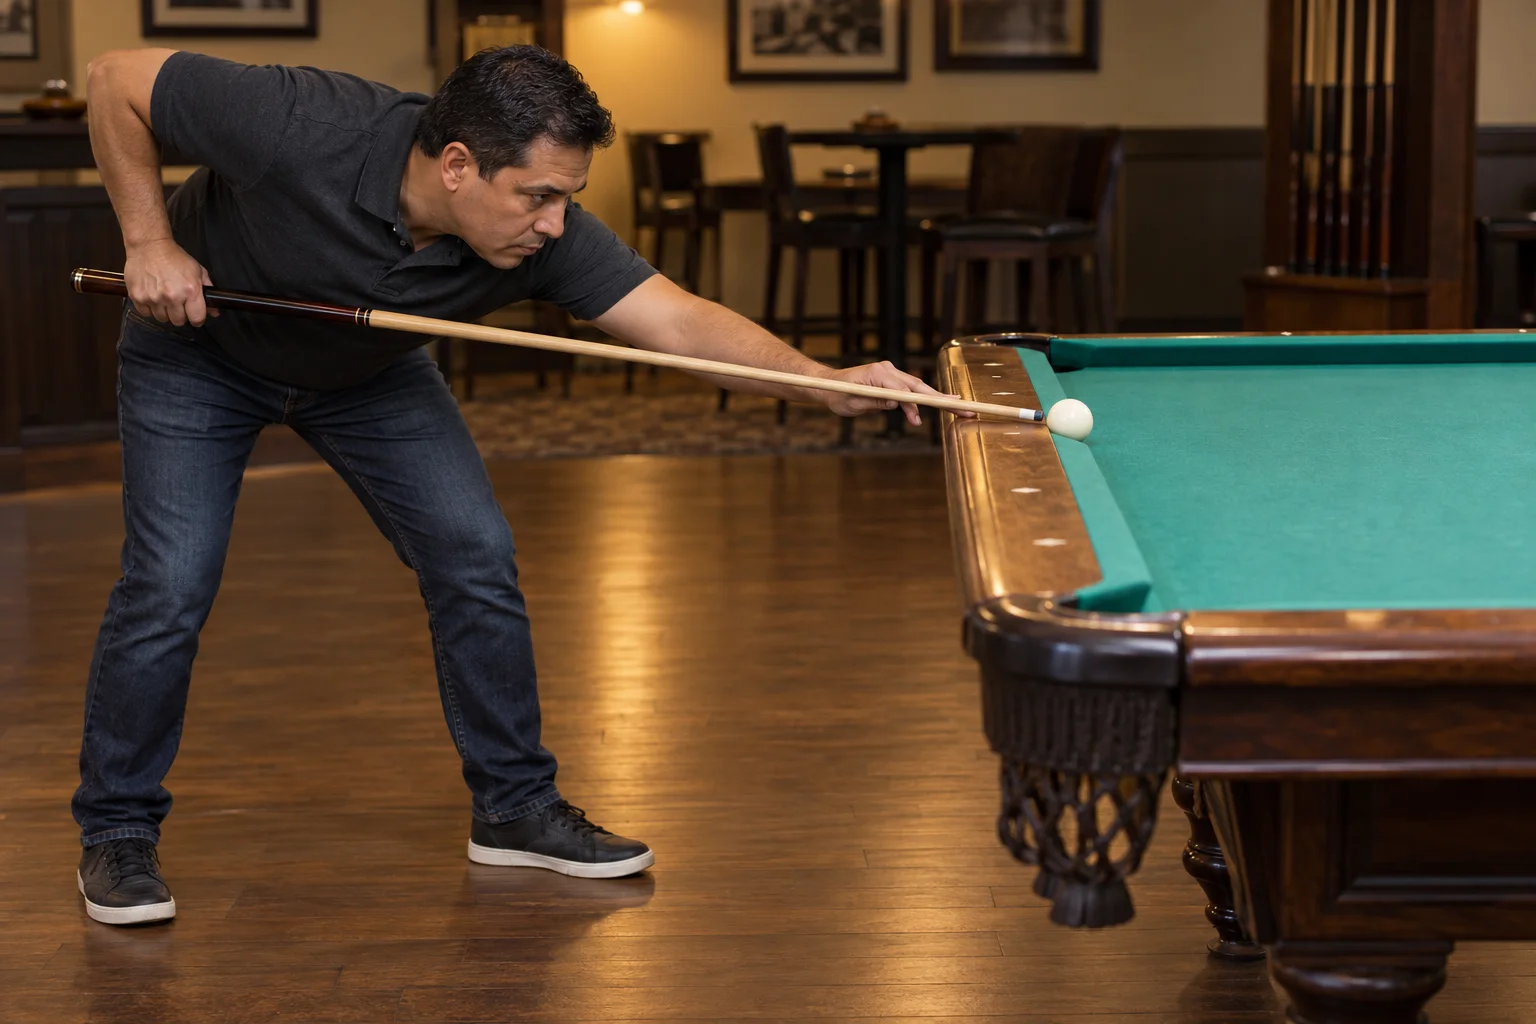
Raise your view enough to inspect clearance.
Keep the bridge on the rail rather than forcing fingers between cushion and ball.
Make a compact, controlled stroke with the least necessary elevation.
Feet & body clearance
Stand where the elevated cue can move without your torso closing its path. Reposition your feet before settling the hand.
The bridge hand
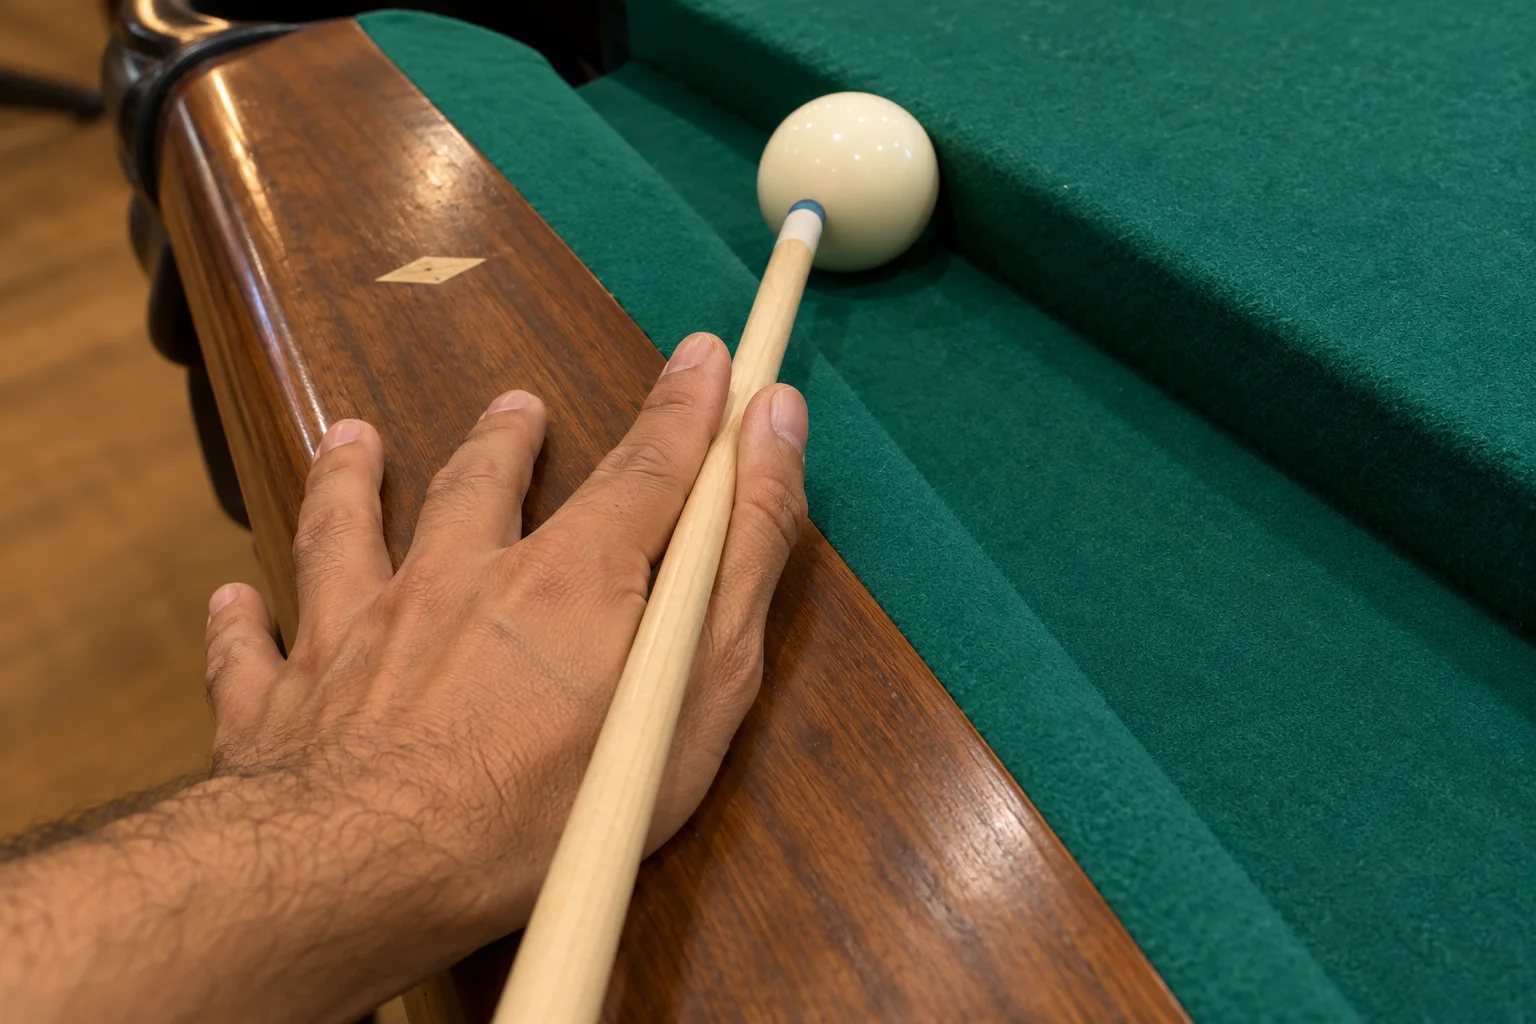
Guide the shaft from the rail behind the ball. The cushion may prevent low or level-center contact; inspect where the tip can actually arrive.
Inspect the cue and hand clearance.
Do not demand low contact through the cushion. Reconsider the shot when the available contact and elevation cannot produce the intended result.
Raise the support, keep the clearance.
An obstructing ball changes both the bridge height and the space available for your fingers.
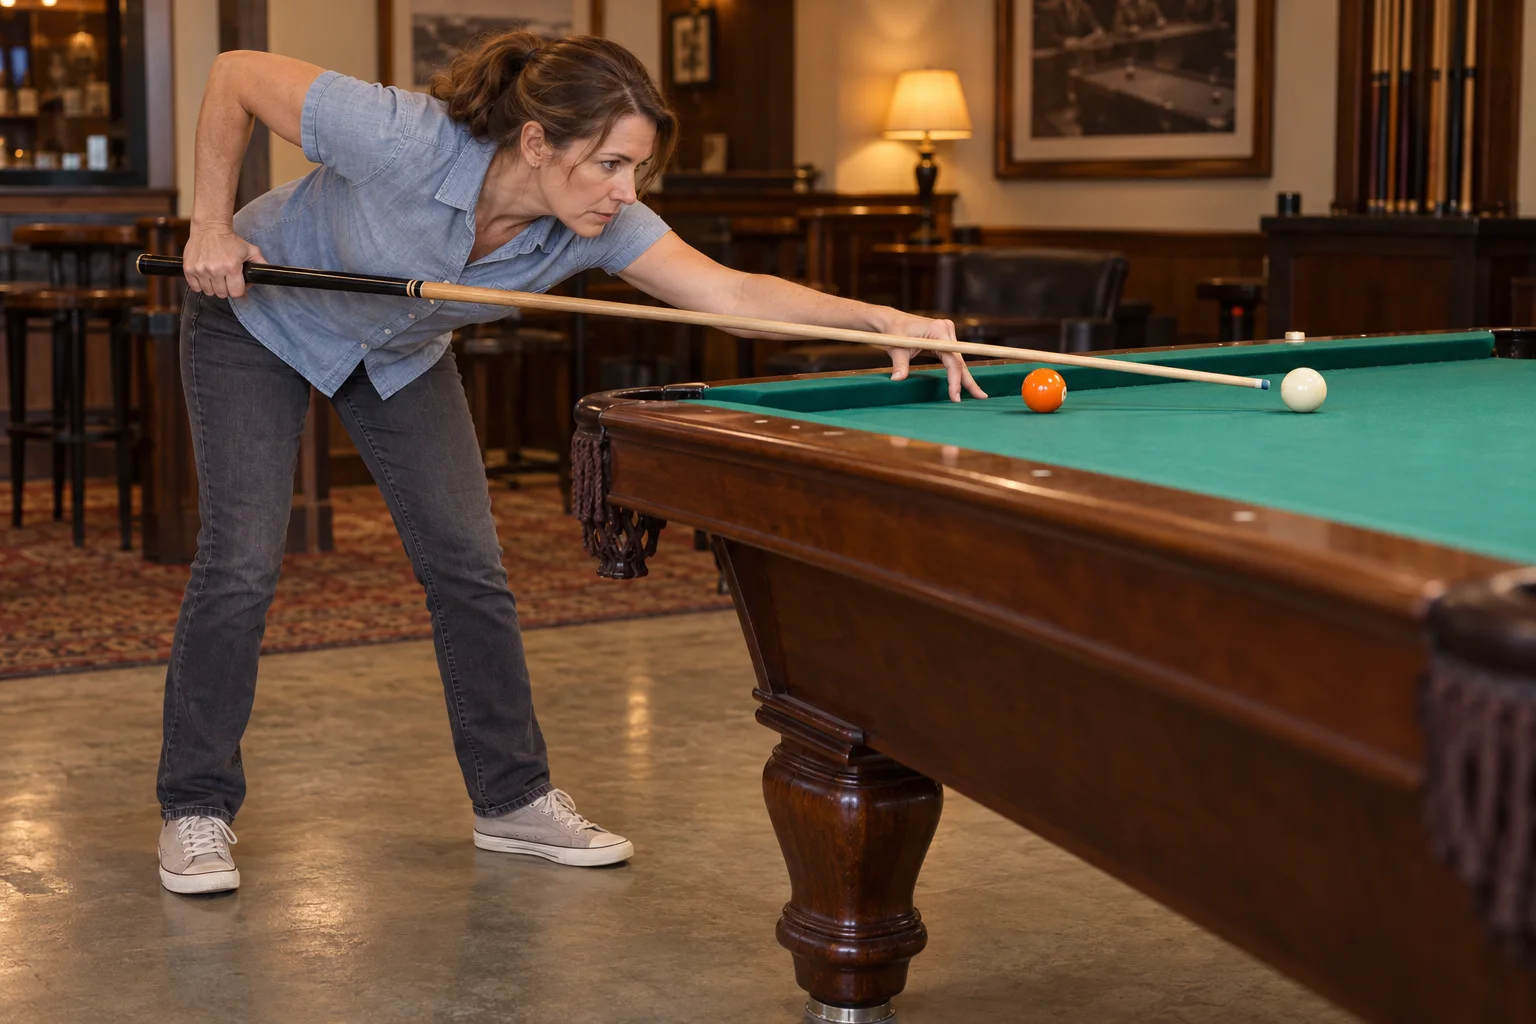
Use a view that lets you inspect the obstacle.
Set the fingertips around the obstruction before any practice stroke.
Raise the cue only enough to clear it, and keep the delivery modest.
Feet & body clearance
Move the stance to put the elevated cue beside the torso. Keep a stable base rather than reaching farther from the same feet.
The bridge hand
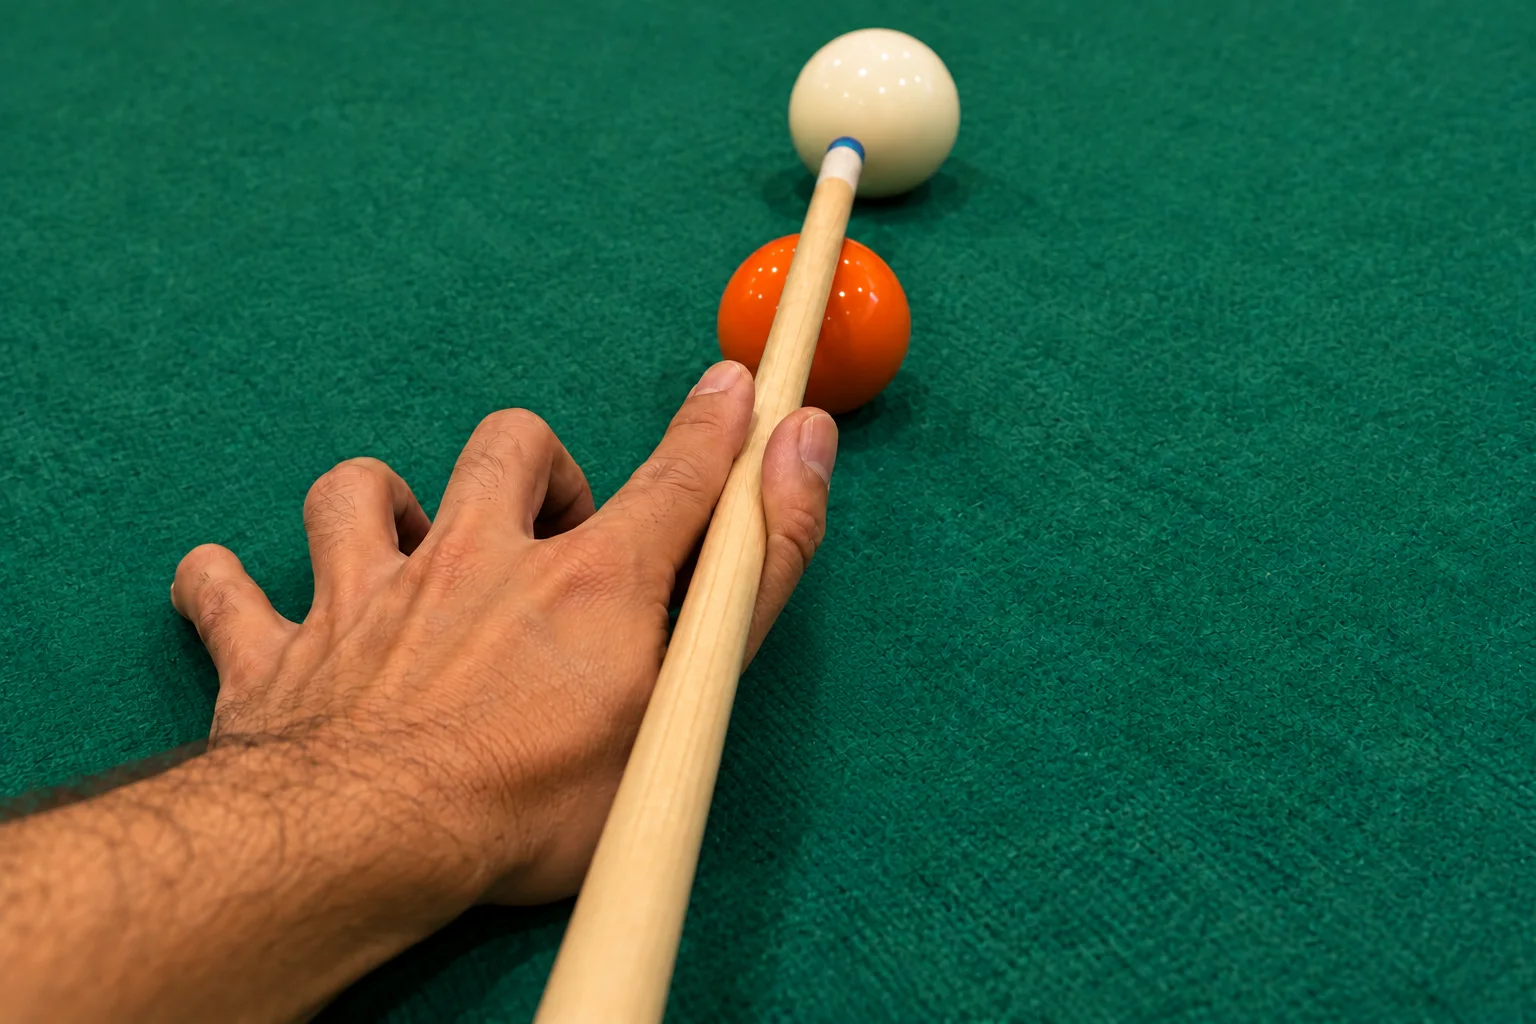
Arch the hand and plant separated fingertips on clear cloth. The obstacle sits in the clearance space, without touching the hand or cue. Check clothing and sleeves too.
Inspect the cue and hand clearance.
If the hand wobbles, the fingers cannot clear the ball, or the required reach is uncomfortable, use a suitable rest or choose another shot.
Move the hips. Keep the cue line.
A corner or an oblique shot may need a more open body position and a different place for each foot.
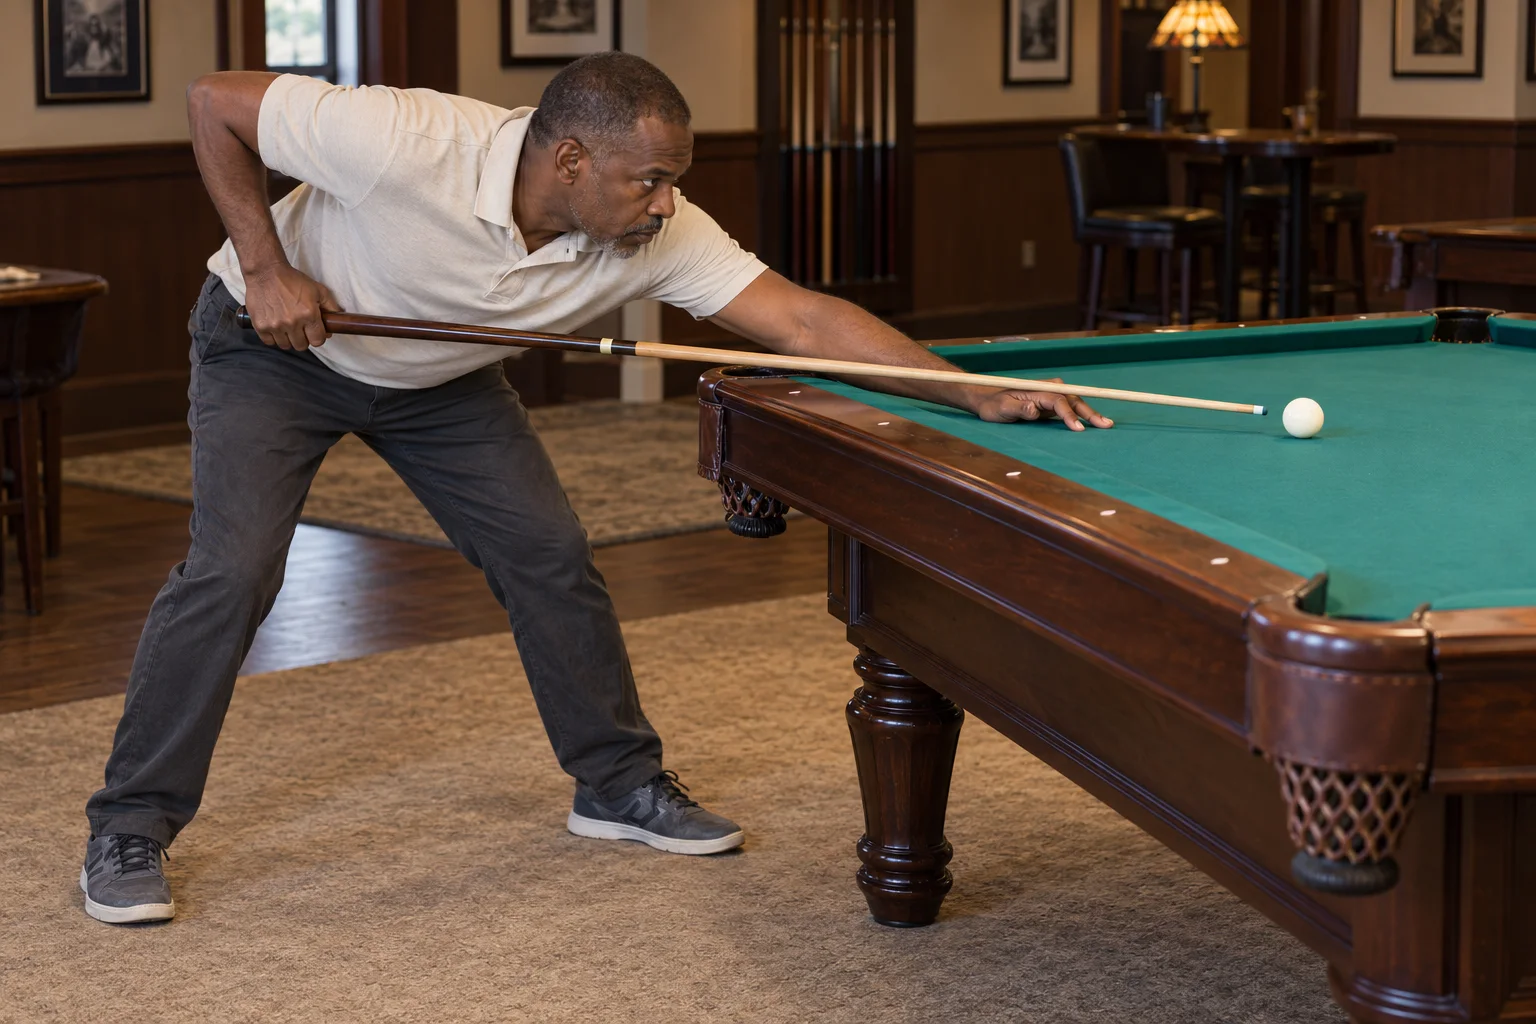
Settle your sighting position after opening the stance.
Choose clear hand placement first, then check whether you can support it comfortably.
Move the hip away from the cue’s corridor so the grip hand can pass.
Feet & body clearance
Walk around the corner and open the lead foot and hip. Inspect the base in the foot detail and the hip clearance in the full-body view. These are examples, not prescribed angles.
The bridge hand
An awkward body angle does not automatically require a raised bridge. Use the simplest stable hand position that the balls and rail allow.
A slow backstroke should pass freely. If you must twist, balance on tiptoe, or hold a painful position, reset, try the other hand if practiced, or use a rest.
Give the reach to the rest.
The bridge head supplies the distant support while you stay in a controllable position.
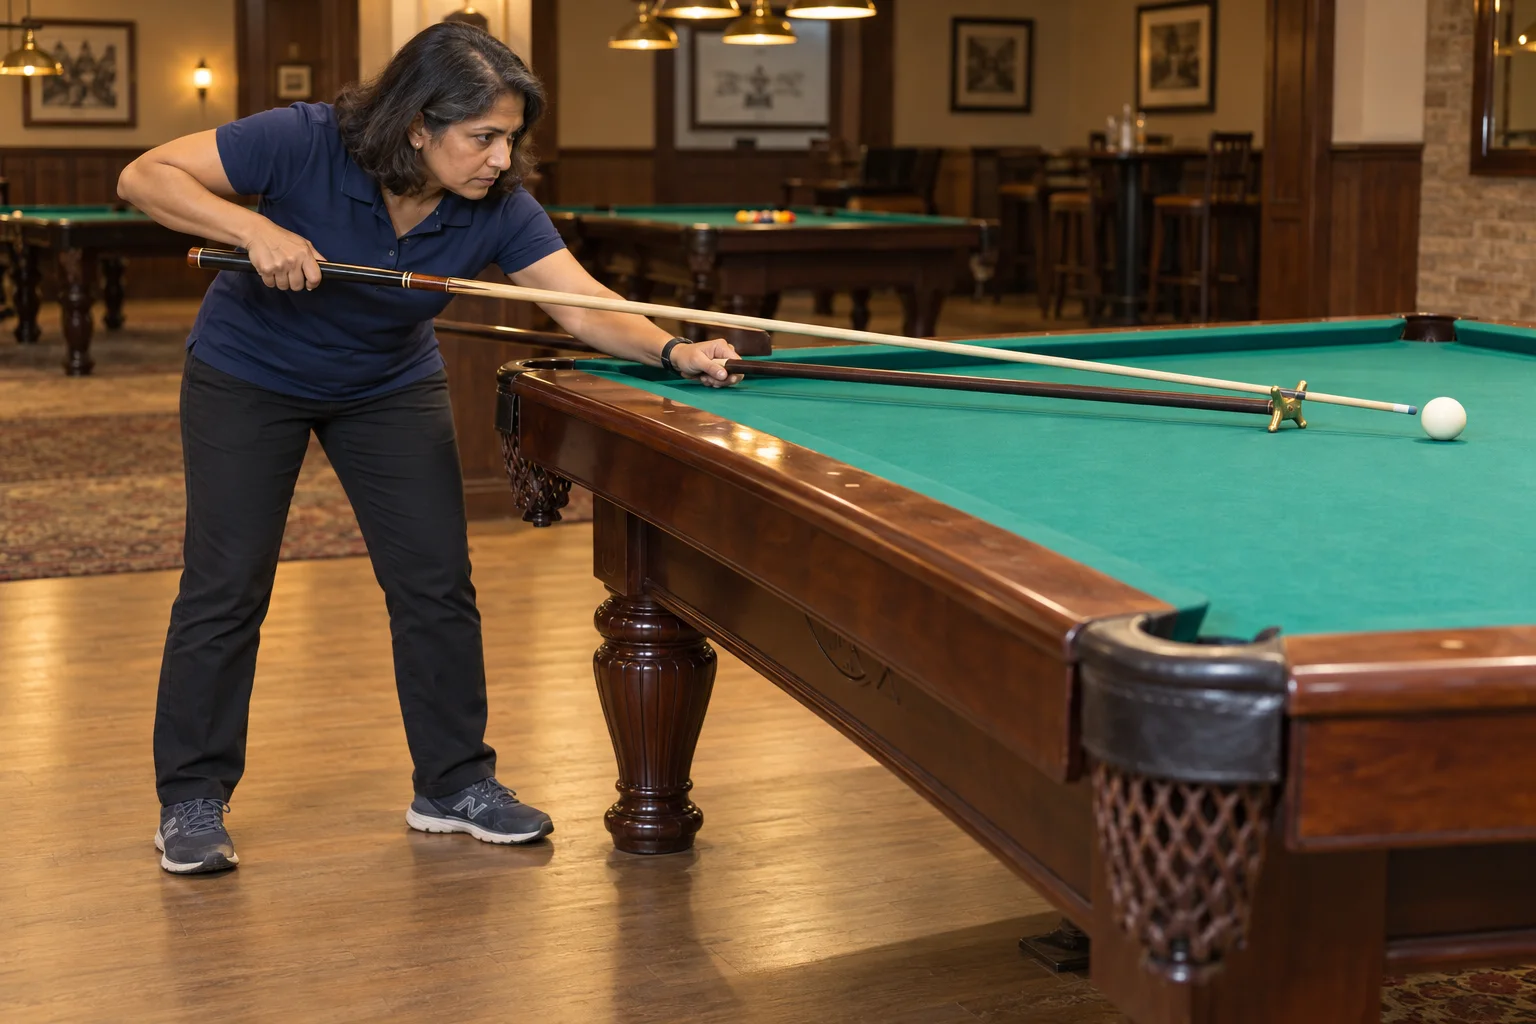
Look along the cue with enough room for the butt to move.
The bridge hand holds the rest shaft steady; its head stays planted on the cloth.
The cue hand delivers a short stroke through the chosen groove. The two shafts have different jobs.
Feet & body clearance
Stay beside the table in a balanced, more upright stance. Move closer around the rail if possible; let the rest reach the cue ball rather than lifting your feet to reach it.
Cue, rest & both hands
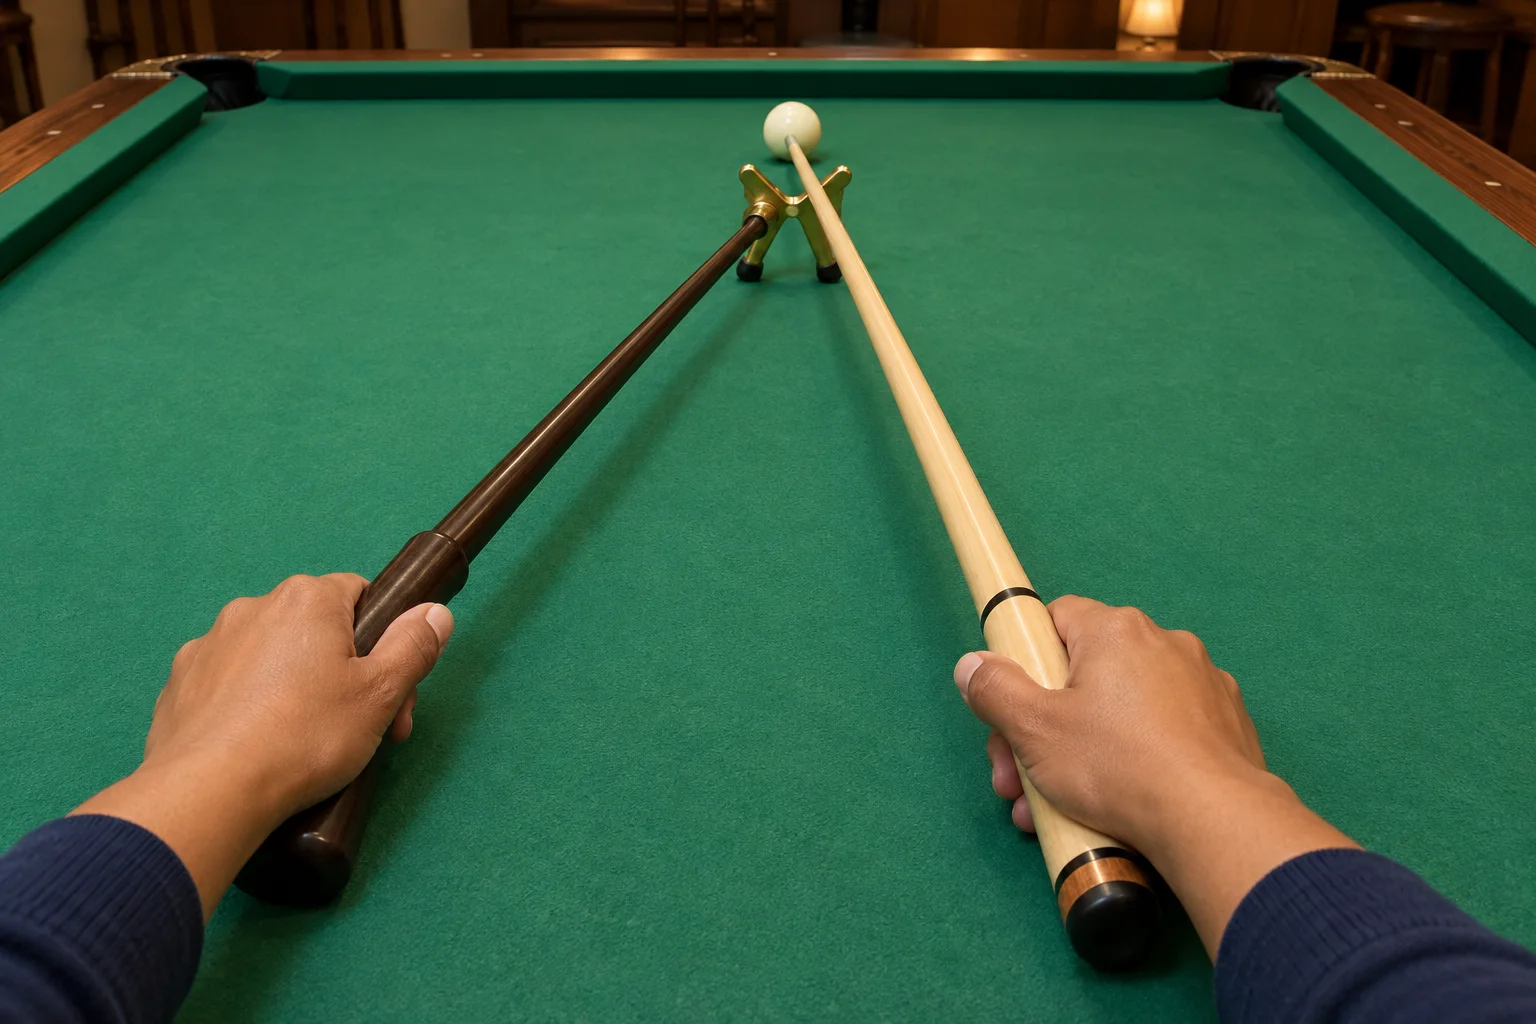
Place the head before settling the cue into a suitable groove. One hand steadies the rest shaft; the other controls the cue near its butt. Keep the rest clear of all balls.
Light shaft · moving cue Dark shaft · stationary rest
Inspect the cue support in the head groove.
Practice a short delivery with the rest completely still. Keep it in place until moving balls have cleared, then lift it away without sweeping over them.
Guide the cue without strangling it.
The back hand holds the cue securely while allowing a smooth delivery.
Find the line before lowering your head.
Keep the bridge stable while you check the other hand.
At address, a forearm close to vertical is a useful starting check. Let the grip stay comfortable as the arm swings.
Feet & body clearance
Leave enough space beside the hip for the gripping hand to move backward and forward. Move your feet if you are having to steer around the body.
The grip hand
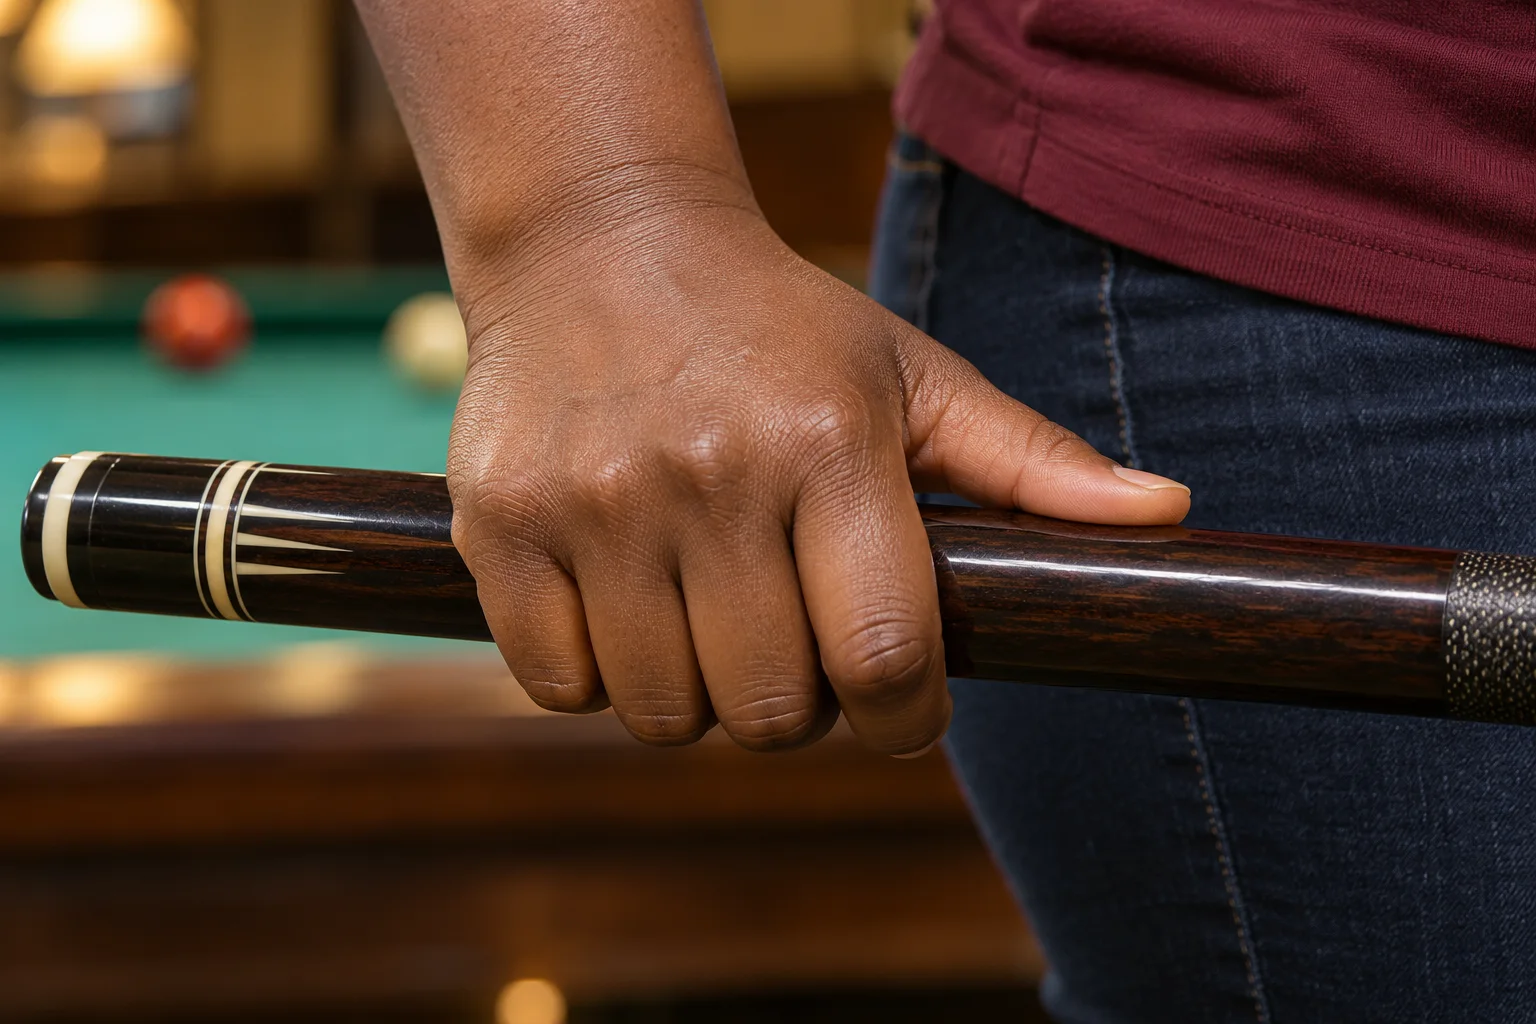
Let the fingers cradle the butt with a relaxed thumb. Keep the wrist comfortable, and notice whether the fingers clamp as the tip reaches the ball.
Use slow practice strokes to feel for a sudden squeeze or sideways wrist movement. Change grip position along the butt if reach makes the stroke cramped.
A Relaxed Grip
Grip pressure
Open and Closed Bridges
Open and closed bridges
A Balanced Stance
Stance and alignment
Using a Mechanical Bridge
Mechanical bridge
Build a Rail Bridge
Rail bridge and cue clearance
Build a Raised Bridge
Bridging over a ball
Bridge Length and Shot Routine
Bridge length and a repeatable pre-shot routine